[ad_1]
“Pay no consideration to that man backstage!” panics The Wizard in what is among the most iconic scenes of the 1939 movie The Wizard of Oz.
Simply as Toto pulls again the inexperienced satin curtain to reveal the legendary floating head as nothing greater than an aged man tinkering with knobs, levers, and buttons, I’m additionally pulling again the veil with a glimpse at a posh edit of Osa and the steps I exploit to take your pet portraits from RAW to the wall.
What’s a RAW File?
As photographers and Adobe.com contributors Nicole Morrison and Jenn Byrne clarify of their article, “Shoot RAW vs. JPEG: Which format must you select?,” “A RAW file is lossless, that means it captures uncompressed knowledge out of your digicam sensor. Typically known as a digital unfavourable, you possibly can consider a RAW file because the uncooked ‘substances’ of a photograph that can should be processed to be able to deliver out the image’s full potential. As you may count on, the tradeoff for these detailed recordsdata is that RAW recordsdata are fairly a bit bigger than JPEG recordsdata. Nonetheless, {most professional} photographers shoot in RAW as a result of it offers them extra data to work with within the post-processing section.”
The Advantages of Taking pictures in RAW
“All that additional data in RAWs is what offers you the latitude to tweak the white stability and publicity, for instance, to a a lot bigger diploma than with a JPEG,” provides Morrison. “Greater picture high quality interprets into extra out there knowledge in relation to picture modifying, giving RAWs a definitive edge over JPEGs. Enhancing applications like Adobe Digicam RAW, Bridge, or Lightroom are constructed for fine-tuning RAWs into polished ultimate photographs.”
Associated: Why You’ll Rethink Your Want for Digital Information
The advantages of capturing in RAW are plentiful, together with:
- Offering the very best degree of picture high quality with out compression and capturing all knowledge out of your digicam’s sensor.
- Permitting better freedom in modifying your photographs, from their white stability to publicity.
- Increasing the dynamic vary, or the vary of your lightest and darkest tones, comparable to mid-tones, highlights, shadows, black, and white.
- Enhancing gradations and colours.
- Presenting extra outlined particulars and fewer noise.
“One of many largest advantages of RAW is the power to recuperate shadows and highlights in post-processing with out bringing within the grainy noise normally related to excessive ISO settings. RAWs are very forgiving you probably have severely underexposed or overexposed areas,” Byrne elaborates.
Whereas RAWs provide photographers the widest vary of data to work with, the tradeoff for this margin does require that extra effort be positioned on perfecting what’s going to develop into the ultimate picture.
For instance, if you happen to take a look at the adjustment panel on the left of Lightroom’s Develop module, you’ll see the worldwide changes I’ve made to the picture of Osa and Alexis, together with tweaking its white stability, considerably rising its publicity, and reducing the general highlights and blacks whereas upping shadows and whites.
From there, having copied these changes, I can then click on the Paste button beneath the far proper panels for a constant, one-click utility to every other photographs for which I wish to apply the an identical changes.
Why the Random Surroundings-Sans-Canine Shot?
Did you catch that second picture that I synced to the identical Lightroom changes because the one with Osa and her mother Alexis? Mainly an an identical picture however with out the 2 of them? Good eye, my buddy! You noticed an important a part of the method of taking Osa’s straight-out-of-camera picture to the ultimate portrait that her mother and father will see at their ordering appointment.
Uh, Jes? I believe you’re lacking one thing…
Not essentially. Let me clarify.
To in the end obtain the enchanted, flower-filled portrait of Osa, this edit wouldn’t be so simple as simply utilizing Content material-Conscious Fill, the Clone Stamp, or the Spot Therapeutic Brush Software to take away Alexis. As I arrange this shot, I instantly acknowledged that the fantastically delicate department of flowers drooping down behind Osa would current a problem in post-processing, therefore the background-only picture.
That’s as a result of, from Lightroom, each photographs are taken into Photoshop the place I start the method of compositing, basically merging and mixing the 2 photographs collectively.
If I ever ask you to fully transfer you and your pup out of a spot we have been simply photographing in, you’re more likely to first give me a puzzled look (and that’s all good—I take zero offense to that), however that is precisely why. In sure conditions, comparable to these the place it’s merely safer or simpler to have you ever nearer to your canine or the place a leash shall be in opposition to a really intricate, repetitive, or detailed background, I don’t wish to be the one to maneuver as me remaining in a really particular place ensures that the background, composition, and focus stays an identical to the photographs I’m taking of your canine in that exact space, even when your canine isn’t in it. It offers me that, for lack of a greater description, fully “clean slate” to work with.
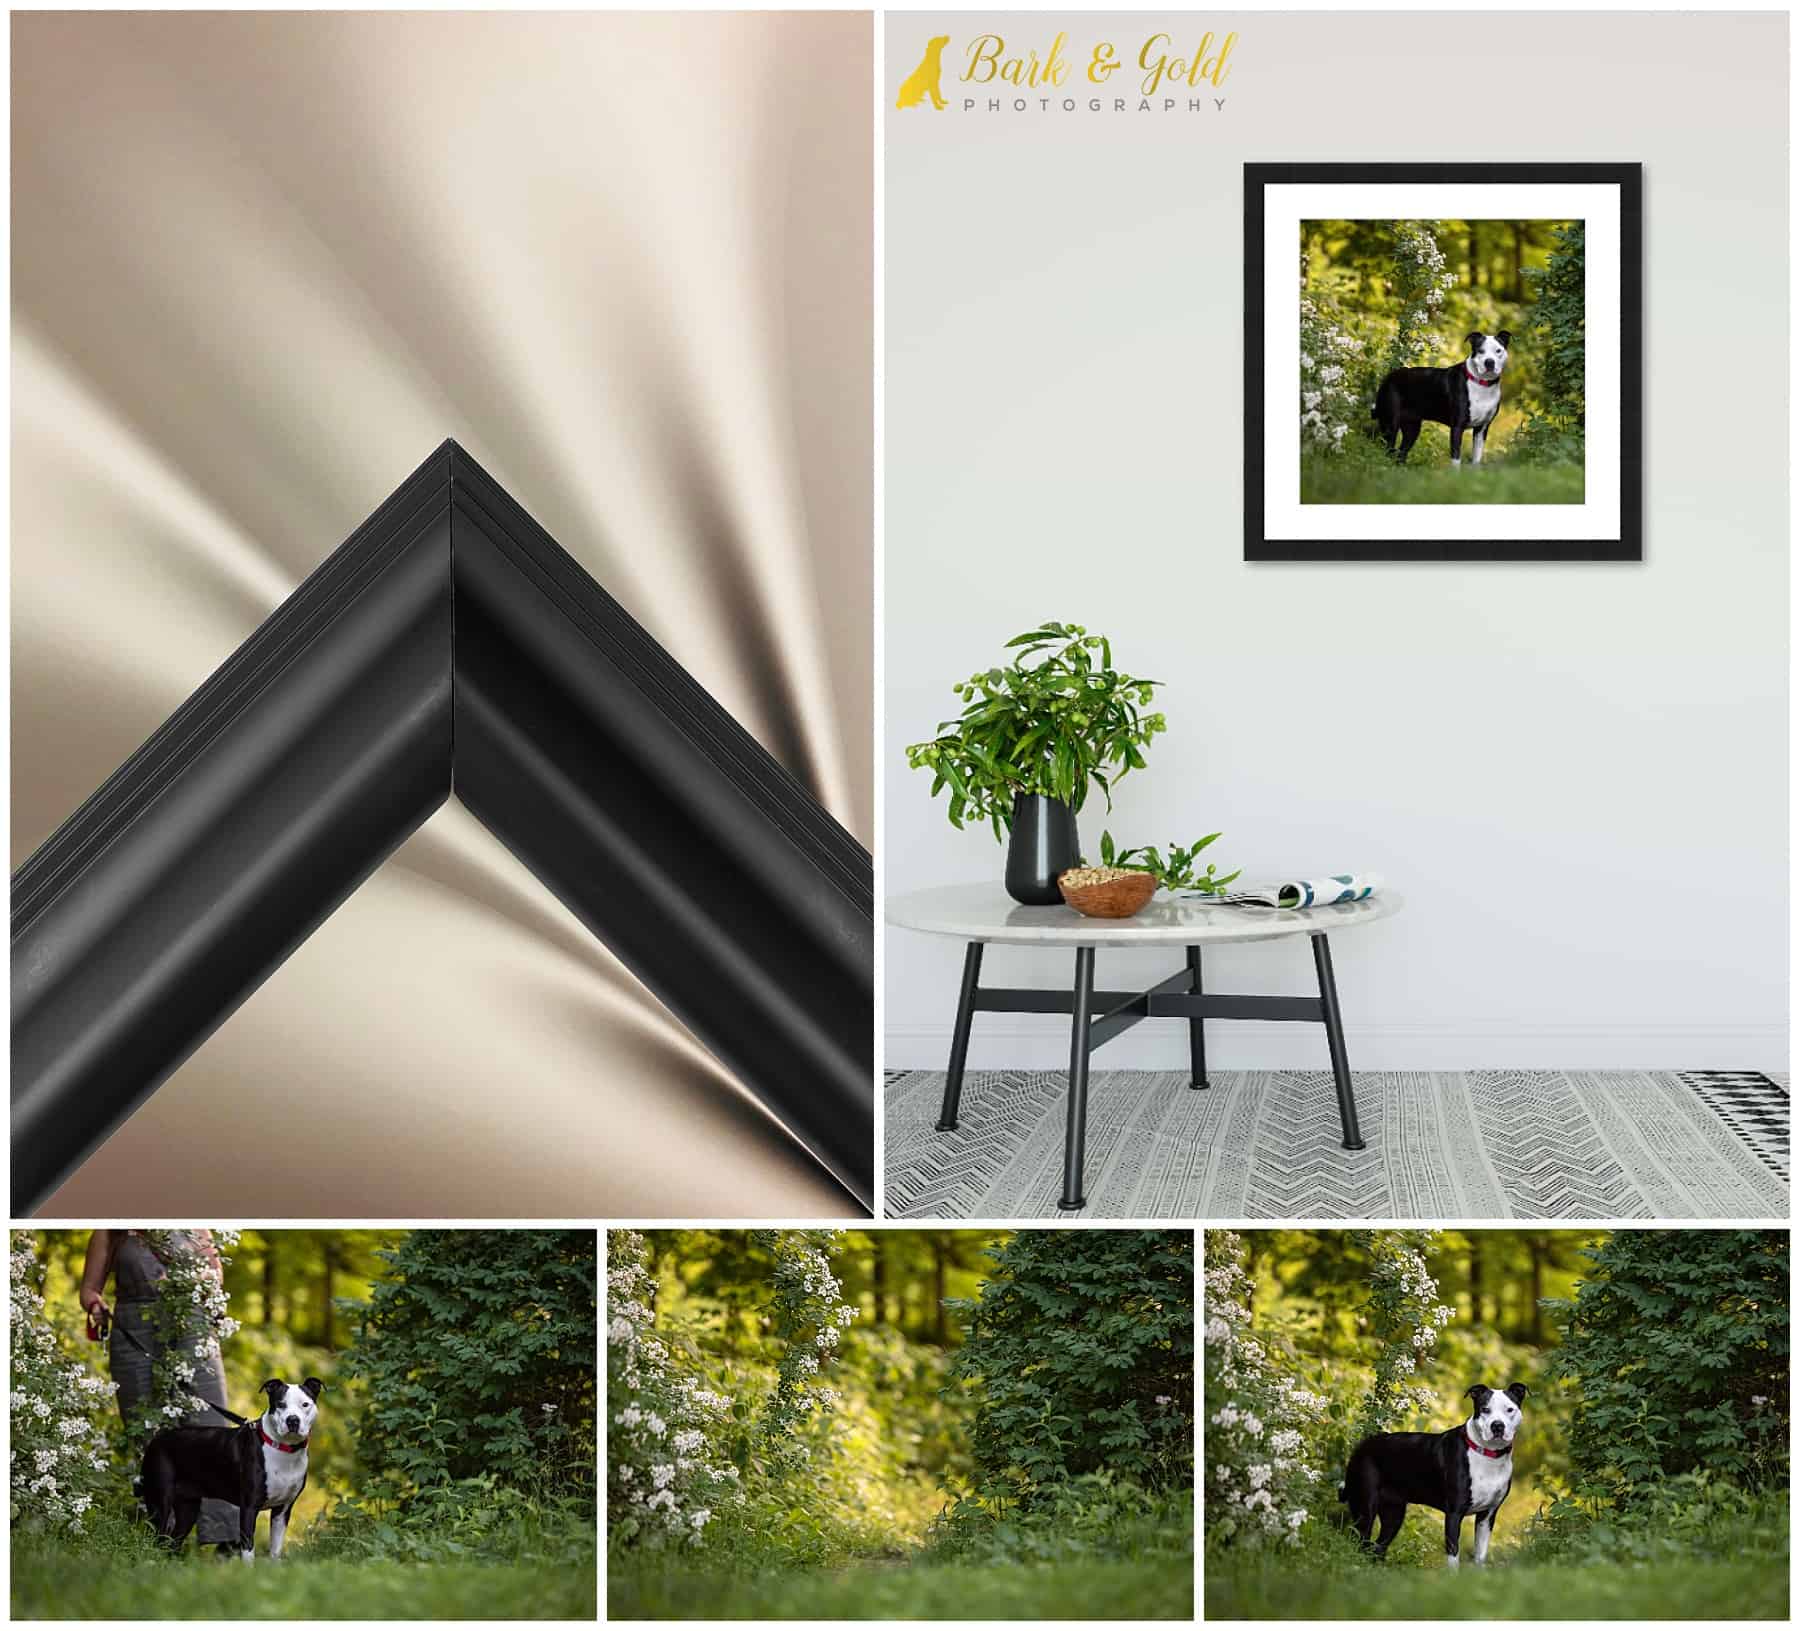
And backstage of Photoshop and with a wave of my Wacom wand, voilà: we’ve received the ultimate portrait I envisioned and what turned an apparent frontrunner for certainly one of three conventional framed prints for the partitions of this household’s new dwelling!
Are you to see how I can work my magic in your pet’s portraits? Let’s join and convey your imaginative and prescient to actuality! Select your journey beneath to start.
Did you get pleasure from this put up? Nice, there’s extra coming your means as a result of it’s a part of a images weblog circle that includes photographers specializing in a wide range of niches! To see extra content material like this and what the subsequent photographer is sharing for our weekly theme, “Behind The Scenes,” try Amy Tedrow, proprietor and photographer of Consider, Create, Encourage, who makes a speciality of industrial, branding, product, and occasion images for small enterprise and non-profit organizations. Amy shall be sharing behind the scenes, ideas, and techniques for creating the proper product photographs for your online business. Proceed to click on the hyperlink on the finish of every put up within the weblog circle till you finally discover your means again right here.
[ad_2]
